2 sisters 2 cities

July 22, 2010

Easy Grilled Chicken Salad

Filed under: K's Recipes — Tags: , — 2sisters2cities @ 8:23 pm

I bet you can already guess what magazine I cooked out of tonight.  I cooked Easy Grilled Chicken Salad from my August Cooking Light, of course!   This recipe was super easy to make (hence the name) and really, really, really good (yes it gets three reallys).

I made a couple of exchanges in this recipe because I already owned some items and I wanted to save some money while I was grocery shopping. First, I replaced the celery with cucumber because I really don’t care for celery.  I didn’t know how it was going to taste, but it ended up being really good and sort of reminded me of taziki sauce a little.  I ate this right away.  I would say if you were going to make this for a meal ahead of time, the cucumbers may get soggy and ruin the salad.  The next replacement I made was that I switched the chopped pecans to chopped almonds.  Finally, I used a little bit of regular onion instead of green onion.  In the end, I think the changes I made were really good.   I ended making on 1/4th the recipe because I was making it for just myself.  You should try some variations of it yourself and tell me how it goes.  The chicken salad is placed on a bed of baby spinach and I also served it with a steamed summer squash.  MMMMmmmm!

Enjoy!

-K

July 21, 2010

Quinoa with Roasted Garlic, Tomatoes, and Spinach

Filed under: K's Recipes, K's sides — Tags: , , — 2sisters2cities @ 9:52 pm

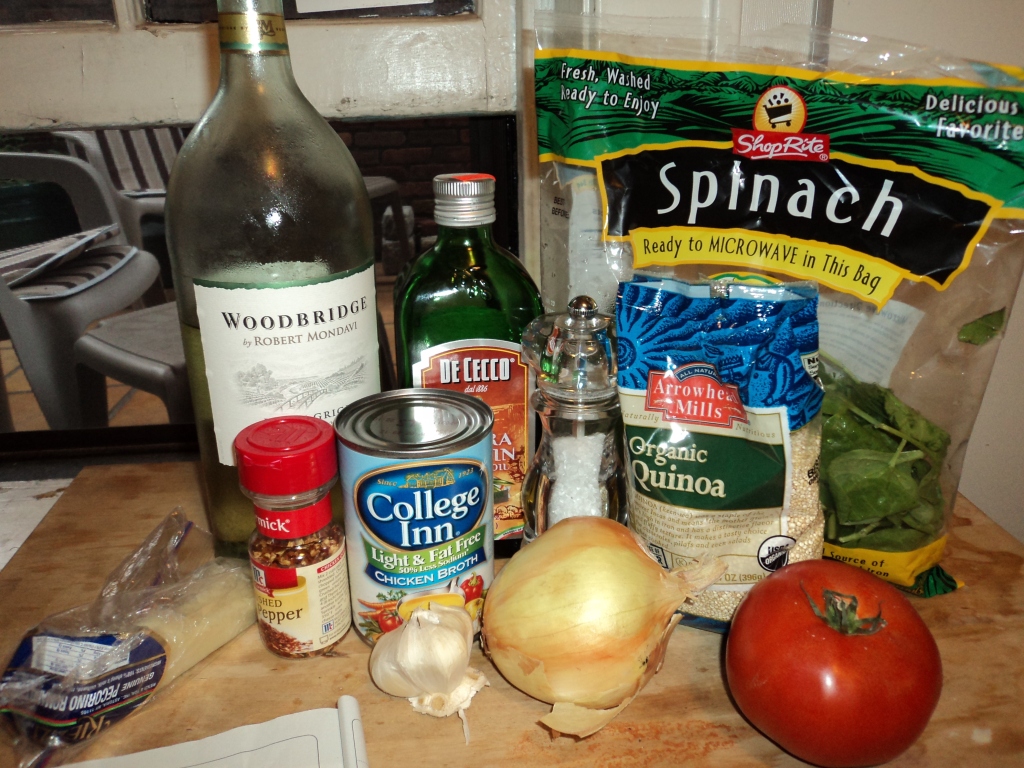
Once again, I decided to try a recipe out from my new August Cooking Light.  Tonight, I made Quinoa with Roasted Garlic, Tomatoes, and Spinach.  This is a side dish but my roommate and I doubled the recipe and made it for 2 meals.   I have never cooked with quinoa and I didn’t even know where to find it in the grocery store (which is rare because I know everything in my grocery store).   I had to call my mom to ask her where she would find her quinoa.  Apparently I was pronouncing it wrong (pronounced KEEN-Wah.)  I eventually found it in the organic sections (where would we be without super moms!)

Roasting the garlic is pretty easy- just peel some of the papery skin off and then cut it half (so you are basically cutting every piece of garlic in half.)  Next, wrap it in aluminum foil and bake for an hour at 350 degrees.  The recipe it pretty simple and besides the hour it takes the roast the garlic, it is pretty quick.   It was so good that I ate my serving for tomorrows lunch!   Oops!

I used an onion instead of shallots because I already had one, and the garlic bunch in the picture is not a whole one because the whole one is in the oven during this picture.   I also used Pecorino Romano cheese instead of parm because I like it better.

Enjoy!

-K

July 19, 2010

Whole Wheat Pasta with Edamame, Arugula, and Herbs

Filed under: K's Recipes — Tags: , , — 2sisters2cities @ 8:08 pm

Tonight, my roommate and I made a recipe from the new August Cooking Light.    While in a rush to the grocery store I looked at the Cooking Light and picked out the recipe Whole-Wheat Pasta with Edamame, Arugula, and Herbs.  It was pretty easy to make- just a lot of herb chopping (basil, parsley, and thyme.)

Start boiling the pasta water before doing anything else and cut up everything else in the meanwhile.   The edamame only takes about 3-4 minutes to heat up.  Make sure you read the whole recipe on the link before you start making it!   The recipe makes 4 pretty large portions so we got dinner and lunch for tomorrow out of it.

Enjoy!

-k

June 12, 2010

Cooking from the Farmers Market

Photo courtesy of msandman via the flickr creative commons license

Last Friday afternoon, we decided to invite some friends over for dinner that evening.  I had no meal plan for the night for even Husband M and I, so I had to quickly figure out what I was going to serve our group.  Fortunately, the Copley Square Farmer’s Market was open so I decided to hit it up to see what I could think of.

For appetizers, I visited the Crystal Brooks goat cheese stand and picked up a tub of their mediterranean goat cheese.  For dinner, I thought out best option would be BLTs.  I picked up a pack of smoked bacon from Stillman’s Turkey Farm, some first-of-the-season tomatoes from the Stillman’s farm stand, and two types of bread from Breadsong Bakery (Rustic Italian and Sourdough).  I already had lettuce at home from our Boston Organics delivery.  As an alternative to mayo, I like to use step 1 of this recipe for Cooking Light for the spread (I used the sage from my herb garden…my first harvest of the year!):

Mayo/Mustard Shallot & Sage Spread

I cut up the tomatoes and washed the lettuce and put them all out on one plate.  I cooked the bacon in the oven on a baking sheet at 400 degrees (approx 15-2o minutes depending on your oven).  I then used the broiler to toast the bread on baking sheets right before we sat down to dinner.  It was a great meal to serve to guests as I could get the majority of things taken care of ahead of time (washing the lettuce, washing and cutting the tomatoes, cooking the bacon, slicing the bread, and making the spread).  I was able to enjoy the time on our roof deck watching the sunset.  (Pictures of our revitalized deck coming soon…I just need a sunny weekend day to take the pics and for Husband M to make a few planter moves).

For dessert, I decided to go with my all-time favorite- strawberry shortcake.  I picked up 4 pints of local strawberries from the market (I can’t remember which stand I ended up going to, but there are 4-5 stands which carry them this time of year).  I had some leftover buttermilk from another dinner, so I used the recipe on the side of the carton to make buttermilk biscuits.  Husband M picked up some heavy cream from the grocery store on his walk home from the bus stop (as well as a can of ReddiWip for himself…nasty!)  Before our guests got here I made the biscuits and washed & cut up the strawberries. I then mixed the strawberries with a half of cup of sugar…it looks like a lot, but it tastes so good and they become really juicy after they sit in it for about an hour (or longer if possible).  Right before I served the dessert, I mixed the heavy cream up with the KitchenAid to make whipped cream.  The process goes a little bit faster if you put the mixing bowl and whisk attachment in the fridge for 30-60 minutes to get them nice and cold.

I really love the idea of skipping the grocery store and doing all my shopping at the farmers’ market.  Not only does everything taste better, but I like to support local farmers and their awesome products.  I have been going to the same market for a few years now (and grew up going to farmers markets in the upstate NY area), but it seems like it is more popular than ever.  It would definitely be an interesting stat to see if farmers’ market volume have picked up at all within the past few years due to the green/local/organic movements.  Granted, I did have to use some items that I had previously purchased at the grocery store and had to pick up one item that day, but I would really like to purchase as many things as possible going to the farmers market this summer.

What meals have you prepared using solely the market?  Have farmers markets in your area become more popular recently?

-m

March 28, 2010

Basic Cooking and Knives Skill Class and a Basil & Lemon Chicken Recipe

Filed under: M's post, M's recipes — Tags: , , — 2sisters2cities @ 8:11 am

One of the other classes I recently took at the Boston Center for Adult Education has been the Basic Cooking and Knives Skill class with Chef Lars.  I took a couples cooking class at the Cambridge Culinary Institute with husband M a little while back, but I did not love that particular class (deadlines, did not know where anything was in the kitchen, people running everywhere, etc).  However, I really enjoyed this class at the BCAE.  While I cook almost every night, I have never taken a class in proper knives skills (by the way, it’s pretty funny to tell someone you are going to a knives class and not specify cooking…it sounds like you are trying to learn how to stab someone).  I learned a lot of good new techniques and was able to modify my current way of using a knife to the proper way.  Each night, we made some really delicious food.  I just so happened to have brought my lunch in tupperware containers, so I was able to bring some extra food to an appreciative Husband M each night.

Here is an easy recipe we made on the night we learned how to cut up a whole chicken (something which I have done before, but not properly).  I made this the other night and it was a very easy meal to put together.  This recipe is pretty lax in that you can add or take away ingredients if you have them on hand or not.

Basil and Lemon Chicken:

Ingredients:
-1 whole chicken, cut into pieces
-8 basil leaves (cut chiffonade style …I know how to do this now!)
-3 or 4 green onion, sliced
-juice of 1 lemon
-salt and pepper
-2 cloves garlic, minced
-4 tablespoons olive oil
-1/3 cup white wine

Set the oven to 380 degrees F.  In a roasting pan, mix the basil, spring onions, lemon juice, olive oil, garlic and white wine (I just eye-balled most of these measurements as they do not need to be exact…I also had some chopped up Italian parsley on hand so I threw this in).  Season the chicken pieces with salt and pepper.  Put chicken into the pan and cover with the marinade.  Roast the chicken for 30-40 minutes based on the pieces (with my oven, it was closer to 45 minutes).  Serve the chicken with the sauce from the pan.  I served the chicken with grilled zucchini and white rice (which nicely soaked up the lemon sauce).

Once I finish my weekly digital photography class, I am thinking about taking Basic Cooking 1,2, and 3 as I learned quite a bit in the class and I imagine could learn a great deal more.

-m

January 10, 2010

Hummus and Toasted Pita Chips

Filed under: M's recipes — Tags: , — 2sisters2cities @ 5:34 pm

This past weekend we hosted some college friends that were visiting Boston.  I also made a small road trip yesterday our to Chicopee, MA to pick up some letterpress supplies for my new press.  When I got home, my husband was entertaining the crew sans snacks.  I also was starving as I only had a small breakfast.  I decided to whip together my favorite last minute recipe.  It’s also a great recipe as I tend to have all of these ingredients on hand.

Ingredients:
-1 can chickpeas with liquid (omit some liquid if you prefer your hummus less watery)
-3/4 tsp kosher salt
-2-4 garlic cloves
-1/3 cup tahini (sesame paste…you can find this in the international aisle in the Middle East or Greek section)
-6 tablespoons freshly squeezed lemon juice (about 2 lemons)
-8 dashes Tabasco sauce
-1  or 2 package pitas
-olive oil
-salt & pepper
-seasoning: you could use rosemary, italian seasonings, or any other similar type of spice mix

Peel the garlic and through in the food processor until chopped thoroughly.  Place the chickpeas, kosher salt, tahini, lemon juice, and Tabasco sauce in the food processor and process until the hummus is coarsely pureed.  Taste for seasoning and serve chilled at room temperature.  I also like to drizzle a little extra virgin olive oil over the hummus before serving.

Set the oven to 400 degrees F.  Chop the pitas up in small triangles and put on 1 or 2 baking sheets.  Pour a few tablespoons extra virgin olive oil and brush the oil over the pitas.  Season the pitas with a bit of salt, pepper, and any additional seasoning you desire.  Put the baking sheets in the oven and cook for about 10 minutes, flipping the pitas over halfway through the cooking time.  Take out of the oven once the edges start turning a golden brown.

If you have any extra vegetables on hand such as carrots or bell peppers, these also make great items to dip into the hummus.

-M

January 5, 2010

Lamb Sliders with Blue Cheese

Filed under: M's recipes — Tags: , — 2sisters2cities @ 8:45 pm

Tonight I made a recipe from this month’s Cooking Light: Lamb Sliders.  It was very good and relatively easy to make after work.  The husband liked it so much that he asked for a full burger-sized version of it for next time!

To start, I sliced 2 medium-sized onions and threw it in a pan with 1 tsp brown sugar and a bit of olive oil:

After about 10 minutes, they started to carmelize.  As I learned during my French Cooking Class at the Cambridge Culinary Institute, don’t stir the onions too often or they will take even longer to cook.

Next, I mixed the ground lamb with a little s&p and mixed it with my hands.  (I started to mix it with a spoon and got nowhere fast- just get your hands dirty!)  I had a little less lamb than the recipe called for so I was able to make 9 patties out of the ground meat.  I cut 6 small rolls in half and put them on a baking sheet to toast them:

I broiled the patties for about 4 minutes on each side (a little longer than the recipe called for).  Then, I toasted the buns for about 1 minute a side (which was a little less than the recipe called for).  The lesson here: be sure to keep a watchful eye on anything you broil.  I can’t tell you how many times I have accidentally burned something I was broiling when I forgot I was cooking it (and once started a small fire in the oven- oops!)  Here is what the lamb patties and buns looked like after:

I pulled together the rest of the ingredients: blue cheese, arugula, and the carmelized onions:

And then we put together our lamb sliders!

-M

December 29, 2009

Crock-pot Pulled Pork

Filed under: M's recipes — Tags: , — 2sisters2cities @ 9:16 pm

This is a really easy recipe to pull together and it’s a great dish because it’s ready as soon as you come home from work. I am always looking for crock-pot recipes, but many of them require cooking for only 3-4 hours (which isn’t a possibility when you are working 8-9 hours at the office, plus commuting). This recipe cooks for 10 hours. I usually throw the ingredients together in the crock-pot the night before and then put it in the fridge overnight. In the morning before I head out for work, I take it out of the fridge and set the crock-pot to low for 10 hours.

Ingredients:
3-4 lb boneless pork roast or pork shoulder
1 tsp pepper
1 tsp kosher salt
1 tsp cumin
1 tsp paprika
1/2 tsp cayenne pepper (add more or less depending on how spicy you want it)
-sliced green pepper
-sliced onion
-1/2 cup brown sugar
-jar of barbecue sauce
-bulkie rolls

Directions:
Trim off any large pieces of fat off pork roast. I sometimes buy bone-in and you can leave this on (just pull it out before serving). Combine pepper, salt, cumin, paprika, and cayenne pepper in small bowl. Rub the spice mix over the pork roast.

Put the sliced green peppers, onions, and brown sugar in the the crock-pot. Place the seasoned meat into the crock-pot next. Add 3/4 of the jar of barbecue sauce (add more or less depending on how saucy you want your pulled pork to be…my husband likes less so I usually only add about 1/2 a bottle).

Cook 10 hours on low or until finished. Using a fork, pull meat apart and shred. Use a large spoon to mix all the ingredients together. You can add more barbecue sauce before serving if it looks a bit dry and also can serve a little sauce on the side. I usually serve this on a bulkie roll with either coleslaw, corn bread, or pasta salad as side dishes. You can also serve the pork without rolls.

My preferred barbecue sauce is Dinosaur Bar-B-Que Sensuous Slathering Sauce (http://www.dinosaurbarbque.com). I’ve also tried it with Dinosaur Creole Honey Mustard barbecue sauce, which was also quite good.

-M

Create a free website or blog at WordPress.com.